光學量測實驗室
 |
|
|---|---|
|
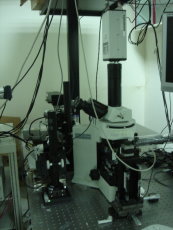
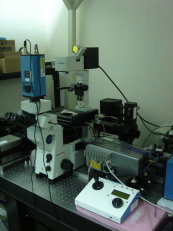
雷射掃瞄共軛焦顯微鏡系統 laser scanning confocal microscope
Super User List: 1.池庚樺(系統管理者) 奈微所 03-5715131-35809
301R_IX71 顯微鏡簡介 2011/06/13 版本 各項功能說明: 1. 暗視野顯微鏡(Dark Field Microscopy) 功能:可增強物體之影像對比,樣品需為可見光能(部分)穿透之樣品,主要為觀測物體之散射光。 光源:鹵素燈 解析能力:空氣聚光鏡式50nm, 應用:奈米金屬顆粒或活體、未經染色的生物樣品。 2. 內全反射式螢光顯微鏡(Total internal reflection fluorescence microscope, TIRFM) 功能:利用光學漸逝波(evanescent wave)激發物品之螢光,可觀測距離蓋玻片表面300nm(主要為100nm)內之螢光訊號,能達到高SNR的影像 光源:488nm、532nm、638nm 雷射光源 解析能力:單顆蛋白質修飾螢光或單顆量子點(Quantum ot)可辨析 (但間距需>500 nm) 應用:細胞貼附(adhesion)偵測、螢光修飾之單分子觀測 3. 顯微鏡式可見光波段光譜儀(Spectrometer) 功能:分析400-700nm 波段之光譜、EM CCD 拍照 光源:穿透式氦氣燈、反射式汞燈、488nm、532nm、638nm 雷射光源 光譜解析能力:0.1 nm wavelength 應用:螢光波段光譜分析 4. 共軛焦顯微鏡(Confocal Scanning Microscope) 功能:利用PZT移動Z軸做切片掃描試片,可建立3-D螢光影像,可提高螢光SNR(觀測物體範圍較TIRF 大、光訊號較弱) Z 軸空間解析度:約300nm (100X 油鏡) 拍照能力及限制:約1-10 張/秒 ,視樣本狀況與掃描區域決定(若螢光強則速度快,反之則慢)。 光源:488nm、532nm、638nm 雷射光源for 高效率共軛焦切片,其他光源效果較差 應用:細胞螢光3-D分佈觀測 PS.以上每項功能基本訓練3 次(至少含兩次自行操作),並協助更新使用手冊後,方可申請考核,考核皆由Super User進行,如需考核,請自行與super user聯繫約定考核時間。 申請表+詳細使用手冊download: http://www.oz.nthu.edu.tw/~d9735803/301R.rar 申請訓練注意事項 : 1. 所需功能可單項申請,請先向學長姐或老師確認是否需求,再諮詢superuser細節,再填申請表決定所需功能,即可申請訓練。 2. 申請期限:每年統一於寒、暑假期間固定訓練與考核,每周僅提供兩時段,每時段上限兩人,訓練時間由管理者視該年度情況而定。報名請至新館703R 洽詢填表或逕行寄e-mail於管理者(見下面Super User List)。其餘時間(除寒暑假外),僅提供自行操作訓練或考核,並請與合格使用者約陪同練習時間。 3. 每位合格使用者有義務認養至少一位需陪同練習訓練的訓練者,無故不願陪同訓練者,將予以停權。 4. 一般使用者開放時段: 周一至周五10:00~22:00。若有特殊需求請洽儀器管理者,待評估後可開放延長使用時間。一般使用者一周內可預約時段為6 小時,每training 其他使用者一次,可增加預約時段1 小時,當累積時數至12 小時,且經管理者評估其使用能力後可晉升為Super User。Super User 於一般使用者開放時段內,可預約上限為12 小時,非一般使用者開放時段則不受限。
NE301 高速攝影機 高速攝影機 (Ultima APX from Photron USA, Inc.) Super User 池庚樺
功能應用:High speed capturing of fast motions (eg. high speed flow, high speed explosions, high speed vibrations etc.) 機台規格:
機台位置:工科新館三樓 NE 301 管理者聯絡資料:池庚樺 NE 102 ext. 35809; 訓練規則:需先向管理者提出申請,確認拍攝需求符合機台適用,經三次訓練並通過考核,可獲得使用資格. Standard Operating Procedures for 高速攝影機:
1. Take the camera and optical components out from the humidity cabinet. 2. RECORD the user’s information, starting usage time, equipment conditions etc. in the log book CORRECTLY. 3. Connect the connector from the processor to the computer. DON’T switch on the computer. 4. Fix your camera head to the designated location according to your requirements. FIX it tightly. 5. Connect the cables (I and II) GENTLY from the processor to the camera head at the CORRECT POSITIONS (I and II) accordingly. 6. After everything is fixed, switch ON the computer. Then, switch ON the processor. 7. Click on the Ultima APX software. A display window will show up. 8. Tune the light intensity accordingly. 9. Choose your resolution, frame rate, and trigger mode. 10. A recording and replay can be done by choosing playback/record or real time according to your requirements. 11. After recording, create a new user file and save the file either in picture or movie. 12. After finishing all the recording and saving the file, close the display window. 13. First switch OFF the light source, then the processor, and finally the computer in sequence. 14. Put the camera and optical components back into the humidity cabinet. 15. Before leaving, RECORD the final usage time, equipment conditions etc. in the log book CORRECTLY.
|
|